Beginner Tools for Vinyl Siding DIY: Essential Guide for Beginners
Transform Your Home: Essential Beginner Tools for Vinyl Siding DIY You Can't Live Without
Embarking on a DIY vinyl siding project can be an exciting way to boost your home's curb appeal and increase its value. With the right tools, even a beginner can achieve professional-looking results. At Lake Co Exteriors, we understand that the key to a successful siding upgrade lies in having the proper equipment and knowing how to use it effectively. This comprehensive guide covers the beginner tools for vinyl siding DIY that are essential for your project, along with expert tips, actionable insights, and answers to common questions. Whether you're replacing old siding or installing new panels, the right tools make all the difference.
Why Are Proper Tools Crucial for Vinyl Siding DIY Projects?
Investing in quality tools ensures safety, efficiency, and a polished finish. Without them, you risk damaging siding panels, creating uneven cuts, or even injuring yourself. Good tools streamline the process, reduce frustration, and help you achieve professional results—even as a first-timer. Plus, choosing the right equipment means your project can be completed faster, saving you time and money.
What Are the Must-Have Tools for Beginning Vinyl Siding Projects?
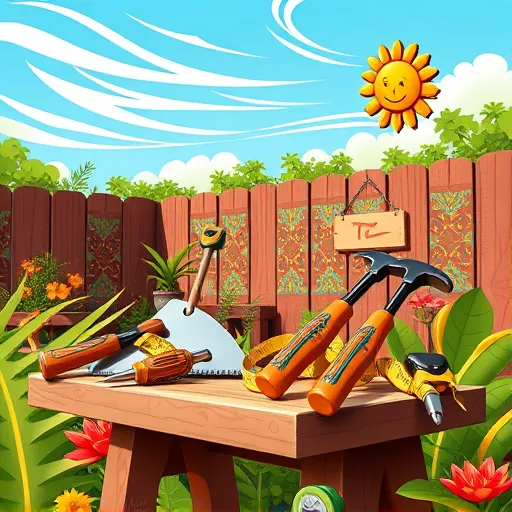
Starting a vinyl siding DIY project requires some fundamental tools. Here are the key items you should gather before beginning:
Tape Measure: Accurate measurements are the foundation of proper siding installation. Measure window and door openings, wall lengths, and soffit areas meticulously.
Level and Square: Ensure your siding lines are perfectly straight and aligned. A quality level and carpenter's square are indispensable for achieving a professional look.
Circular Saw with Fine-Tooth Blade: Cutting vinyl siding requires a saw that can make clean cuts without cracking or chipping the material. Use a blade designed specifically for vinyl.
Chalk Line Tool: Mark straight guidelines on your walls for panel alignment, aiding in precise installation.
Hammer or Nail Gun: For securing siding panels and accessories. A nail gun speeds up the process but a regular hammer works fine for small projects.
Utility Knife: Perfect for trimming panels and making detailed cuts around windows and trim.
Drill with Various Bits: Necessary for fastening siding components, especially when attaching starter strips or J-channels.
Ladder or Scaffolding: Safety first—reach higher areas comfortably while maintaining stability.
Protective Gear: Safety glasses, gloves, and ear protection keep you safe during cutting and nailing.
How Do You Choose the Right Siding Panels and Accessories?
While tools are vital, selecting high-quality siding panels and accessories is equally important for a successful DIY project. The right materials not only look better but also withstand the elements longer. Visit our [post on siding fascias](https://lakecoexteriors.com/post/siding-fascia-groveland-florida) to learn about choosing durable fascia and trim options that complement your siding.
What Are the Best Practices for Cutting Vinyl Siding?
How can I make clean cuts without cracking the siding?
Using a circular saw equipped with a fine-tooth blade designed for vinyl is the best approach. Measure carefully and mark your cut line with a chalk line tool for accuracy. Always cut with the protective backing facing down to prevent chipping. For detailed cuts around corners or obstacles, a utility knife can provide precise control.
How Do You Properly Attach Vinyl Siding for a Seamless Look?
Securing siding panels correctly is crucial. Start with the utility trim and J-channel to create clean edges. Overlap panels properly and leave expansion gaps to prevent warping. Use corrosion-resistant nails or fasteners, driving them just enough to hold panels in place without crushing the material.
What Are Some Tips for Achieving Straight, Even Lines?
How can I ensure my siding installation is level and uniform?
The key is to establish a good starting point. Use a level to mark a straight baseline at the corner of your house. Work your way across, continually checking alignment. For larger projects, a chalk line helps maintain consistent levels. Remember, patience and accuracy in the initial stages ensure a professional finish.
Can I Install Vinyl Siding Over Existing Siding?
In many cases, yes. Installing over existing siding can save time and effort. Ensure the underlying surface is solid, clean, and free of damage. Properly attach furring strips if needed to create a smooth surface. Always verify local building codes before proceeding.
What Are Some Common Mistakes to Avoid During Vinyl Siding DIY?
Not leaving enough room for expansion—climate changes cause siding to expand and contract.
Failure to measure accurately—results in uneven, unsightly panels.
Using the wrong nails or fasteners—can lead to warping or panels falling off.
Skipping protective gear—safety should always come first.
Attempting to install siding in extreme weather—wait for mild temperatures for best results.
Where Can You Find Quality Vinyl Siding Supplies and Expert Advice?
For top-grade materials and professional guidance, explore local suppliers or specialized online stores. To enhance your project, consider [selecting soffit panels in bulk](https://lakecoexteriors.com/post/24-soffit-panels-bulk-pricing), which can offer savings and convenience. Additionally, understanding how to properly attach siding accessories like soffit pieces can significantly boost your home's durability and aesthetic appeal.
How Do You Finish Your Vinyl Siding Project for a Polished Look?
After installing the main panels, add finishing touches with trim, corner posts, and soffits. Properly sealing edges prevents water intrusion and prolongs the lifespan of your siding. Consult our guide on [600mm soffit boards](https://lakecoexteriors.com/post/600mm-soffit-board) for installation tips that ensure a neat and weatherproof finish.
FAQ: Your Questions About Beginner Tools for Vinyl Siding DIY Answered
What safety equipment should I use during siding installation?
Always wear safety glasses, gloves, and hearing protection when cutting and nailing siding. Using a sturdy ladder and keeping your work area organized can prevent accidents.
Is it necessary to rent or buy professional-grade tools?
While renting or purchasing professional tools can ease the process and improve results, many DIYers successfully complete projects with high-quality consumer tools. Evaluate your project scope and budget to decide.
How can I find local experts for troubleshooting or consultation?
Contact your local home improvement stores or visit online forums and communities. Lake Co Exteriors also offers resources and personalized advice for DIY enthusiasts.
Ready to Begin Your Vinyl Siding DIY Journey?
Equipped with the right beginner tools for vinyl siding DIY, you’re well on your way to transforming your home's exterior efficiently and beautifully. Remember, preparation, patience, and attention to detail are your best allies. With a bit of effort and the right tools, your DIY project can be both rewarding and cost-effective. Dive into your siding upgrade with confidence—your home will thank you for it.


